Old wallpaper often looks fine until the first coat of paint goes over it. Then the seams lift, the pattern shows through, and bubbles appear within days. Proper wallpaper removal before painting prevents these problems and gives the new finish a clean surface to bond with. We have written this blog to explain the process, the likely costs, and the practical steps that protect your walls.
Why Wallpaper Should Come Off Before Painting
Painting directly over wallpaper is a common shortcut. It rarely works well.
Paint is water-based in most homes. When it touches the paper, it can loosen the adhesive underneath. The paper then swells, wrinkles, and pulls away from the wall. Textured or embossed patterns also remain visible, even after two or three coats.
Here are the main reasons to remove it first:
Paint adheres better to bare, primed drywall than to paper.
Seams and edges will not telegraph through the finish.
Hidden moisture, mould, or wall damage can be found and repaired.
The final color looks even and true to the sample.
Taking the time for wallpaper removal now saves repainting later.
The Wallpaper Removal Process, Step by Step
A careful approach protects the drywall. Rushing tends to gouge the surface and adds repair work.
Prepare the Room
Clear the furniture or move it to the center of the room. Cover the floor with drop sheets and tape the edges of baseboards. Turn off the power to the room, then cover outlets and switch plates with painter’s tape.
Identify the Wallpaper Type
The type determines the method. Three kinds are common:
Strippable: peels away in full sheets with little effort.
Peelable: the top layer lifts off, but a paper backing stays on the wall.
Traditional paper: bonded firmly and needs moisture and scraping.
Lift a corner with a putty knife to test it. If the sheet comes away cleanly, the job is simple. If it tears into small pieces, more work lies ahead.
Score the Surface
Use a scoring tool to make small perforations across the paper. Apply light pressure. Deep cuts can damage the drywall paper beneath. These tiny holes allow the removal solution to reach the adhesive.
Soften the Adhesive
Apply a wallpaper remover solution with a sponge or spray bottle. Warm water mixed with a small amount of liquid fabric softener also works for many homes. Allow it to soak for 10 to 15 minutes. Patience matters here, because dry scraping is the quickest way to tear the wall.
Scrape Gently
Hold a wide scraper at a shallow angle. Work from the top of the wall down. Keep the blade flat, and re-wet any stubborn areas. A steamer can help on older, heavily bonded paper.
Clean Off the Residue
Wash the wall with warm water and a mild cleaner. Leftover adhesive is a hidden cause of peeling paint. It feels slightly tacky or slick, so run your hand over the surface after cleaning.
Repair and Prime
Fill small holes, gouges, and seams with joint compound. Sand the patches once they dry. Apply a quality primer to seal the wall. This final layer helps the paint cover evenly and protects the drywall from moisture.
What Does Wallpaper Removal Cost?
Pricing depends on several factors. As a general estimate, professional work often ranges from about $2 to $5 per square foot. Larger or more complex jobs can exceed that range. Final quotes vary by region, wall condition, and scope.
These factors influence the price:
Wall size and height: Rooms with tall ceilings or stairwells take longer.
Number of layers: Older homes may contain two or three layers of paper.
Adhesive strength: Aged glue resists solutions and needs extra labor.
Wall condition: Damaged drywall needs patching before paint.
Access: Furniture, tight corners, and fixtures add time.
Do-it-yourself work lowers the upfront cost, but tools, supplies, and repair materials add up. A damaged wall can also turn a weekend project into a costly repair. Many homeowners compare both options before deciding.
Professional Help or a DIY Approach?
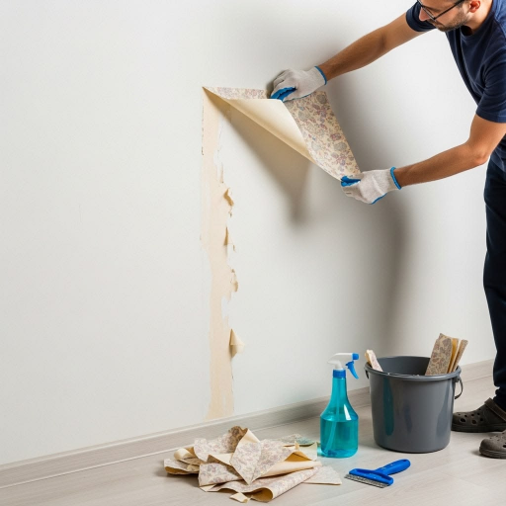
Both options can work. The right choice depends on the room and your schedule.
When DIY Makes Sense
The wallpaper is strippable or peels easily.
The area is small, such as a powder room.
You have time and the right tools.
When Professionals Are the Better Choice
The paper has several layers or very strong adhesive.
The walls show signs of moisture or mould.
The home is older, with plaster walls that tear easily.
A tight deadline requires a quick, clean finish.
Local wallpaper removal services Waterloo homeowners rely on can assess the wall, choose the right method, and handle the repairs and priming in one visit. That coordination often prevents the delays that come from separate trades.
Practical Tips for a Smoother Result
Small habits make a visible difference. Keep these points in mind:
Test a small area first. It reveals the paper type and the best method.
Work in sections. Wet one wall at a time so the adhesive does not dry again.
Protect electrical points. Water near outlets is a safety risk.
Use the right scraper. A plastic blade is gentler on soft drywall.
Do not skip primer. Bare walls absorb paint unevenly.
Allow full drying time. Painting over damp walls can cause blistering.
Ventilate the room. Open windows help the surface dry faster.
A tidy workspace also helps. Wet paper scraps stick to everything, and a quick sweep between sections keeps the floor safe.
Common Mistakes to Avoid
Most problems come from a few repeated errors.
Painting over the paper. This leads to bubbling and visible seams.
Over-wetting the wall. Too much water can soften the drywall.
Using a sharp metal blade at a steep angle. It digs into the surface.
Ignoring leftover glue. Paint will not bond well to it.
Skipping repairs. Small cracks become visible once the paint dries.
Avoiding these mistakes protects both the wall and the budget.
Conclusion
Careful wallpaper removal is the foundation of a lasting paint finish. The process takes patience, the right tools, and attention to detail, but the result is a smooth wall that holds color well. Whether a project is small or complex, planning each step reduces repairs and protects the investment.
For homeowners who prefer expert support, 180 Transformations Inc offers dependable guidance and skilled work from preparation through to the final coat. A professional assessment can clarify the scope, the timeline, and the cost before any work begins. With the right preparation, every room can be ready for a fresh and polished finish.
FAQs
1. Can we paint over wallpaper instead of removing it?
It is possible in rare cases, but it is not recommended. Moisture from the paint can loosen the adhesive, which leads to peeling and bubbles. Removing the paper first gives a smoother and longer-lasting finish.
2. How long does wallpaper removal take?
A small room may take a few hours to a full day. Larger rooms, multiple layers, or strong adhesive extend the timeline. Repairs, drying, and priming add further time before painting begins.
3. Will wallpaper removal damage the drywall?
Damage can occur if the process is rushed or done with the wrong tools. Scoring too deeply or scraping dry paper are the usual causes. Careful technique and proper repairs keep the wall in good condition.
4. Do we need primer after removing wallpaper?
Yes. Primer seals the surface and covers small repairs. It also helps the paint adhere evenly and prevents moisture from soaking into bare drywall.